|
|
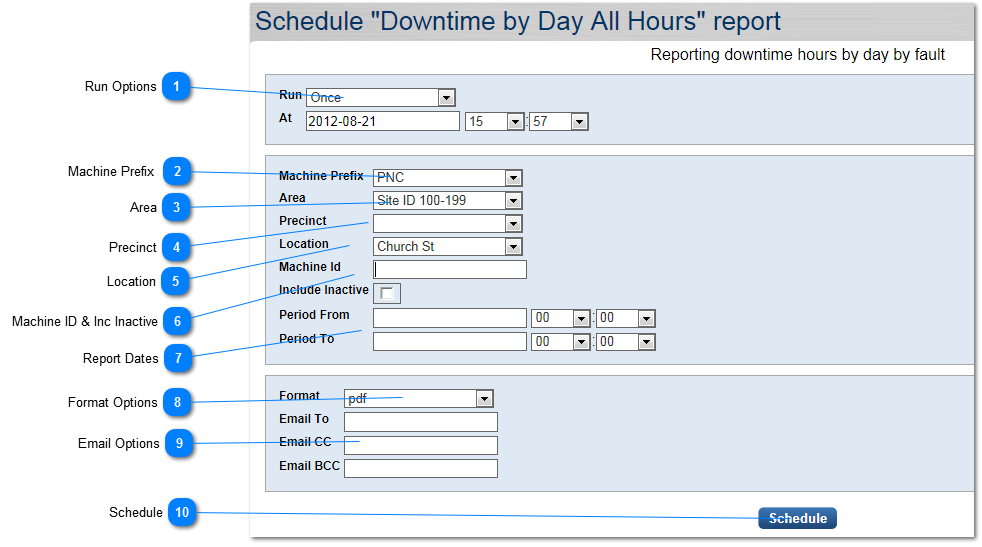
Hold your mouse over any of the numbers below for more information, or click.
This page explains the easy way to schedule a report.
 Run Options
This drop down allows you to choose when to run the report.
If you select ONCE, the report will be generated as a one off at a selected time as shown in the options below. Simply enter a date and a time.
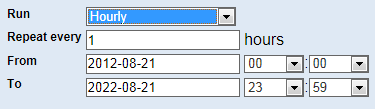
If you select HOURLY, you can run the report every X amount of hours. You can enter a start and end time for the hourly report to be executed. It will not run outside of these hours.
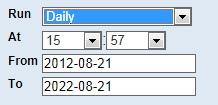
If you select DAILY, you can run the report every day at a specified time. You can enter a start and end time for the daily report to be executed. It will not run outside of these days.
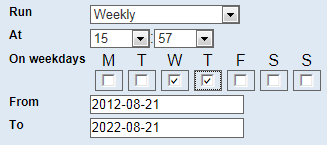
If you select WEEKLY, you can run the report weekly at a certain day(s) of the week, and a certain time. You can enter a start and end date for the reports to be executed. It will not run outside of these dates.
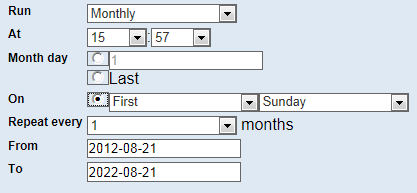
If you select MONTHLY, you have the following options
-
Set a time of the day to execute
-
Choose a month day, so you may want it to run on the 5th day of the month, last day of the month, or first Sunday of every month
-
Set a repeat amount in months
-
you can enter a start and end date for the reports to be executed. It will not run outside of these dates.
| |
 Machine Prefix
Using the drop down menu you can select the Machine Prefix to run the report against. Leave empty for all.
| |
 Area
Select the area you wish to report on. Leave empty for all.
| |
 Precinct
Select the Precinct you wish to report on. Leave empty for all.
| |
 Location
Select the area you wish to report on. Leave empty for all.
| |
 Machine ID & Inc Inactive
Enter the machine ID you wish to report on. Leave empty for all.
By default inactive machines will not be reported on unless you check the "Include Inactive" box.
| |
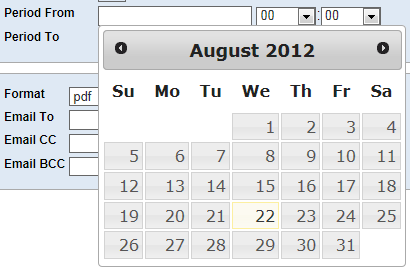
 Report Dates
Here you can select dates to set a reporting time frame.
A calendar will appear for Period From and To allowing you to select dates. Times (HH+MM) can also be selected from a drop down menu.
| |
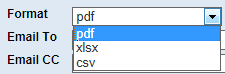
 Format Options
Using the drop down menu you can select the following Report formats
| |
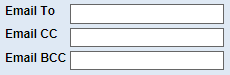
 Email Options
Simply enter your email address that you wish to have the report emailed to. You can opt to use CC (Carbon Copy) or BCC (Blind Carbon Copy) fields if you wish.
Once the report is generated, it will be emailed to the provided email address from noreply@itslonline.com
| |
 Schedule
Once all the parameters are set, click on schedule and the report will be added to a queue waiting to be executed.
You can view the process of the report by clicking on the report schedule button in the navigation bar. Click here for more info. | |
|
|
 EziCom2 User Guide